Speeding up the Window Regulators
01/19/15
The windows on the Verde have always been fairly slow, a bit better on really hot
days but still not great. There was a thread on the AlfaBB where someone took apart
the window regulator and regreased it with good results. This documents the project
I undertook to do the same thing.
I had a spare set of regulators to do this so didn't have to take the old ones out of
the door first. I'll document this a little out of order from what I actually did by
showing how to remove the regulators from the door first and then how I cleaned and
regreased them.
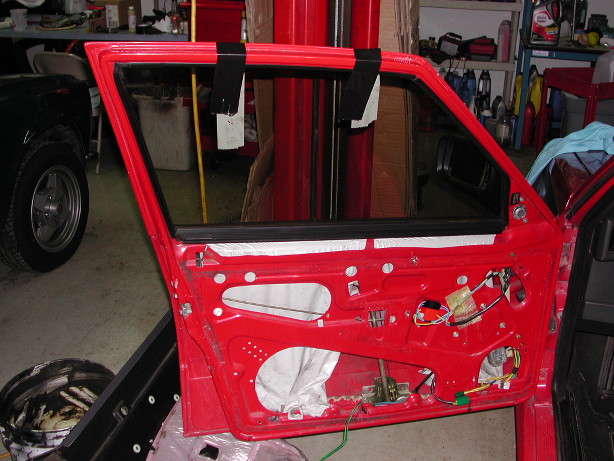
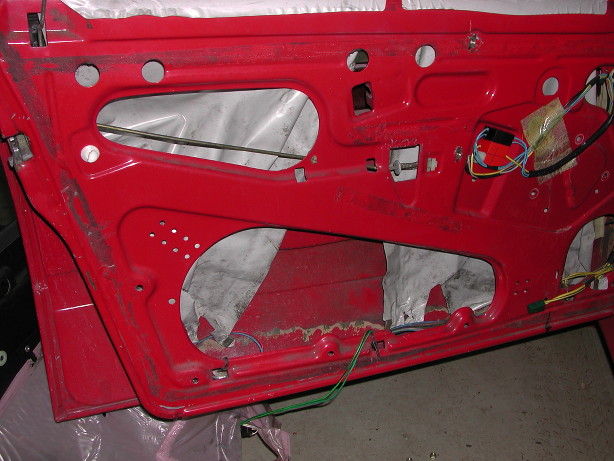
First start by removing the door panel:
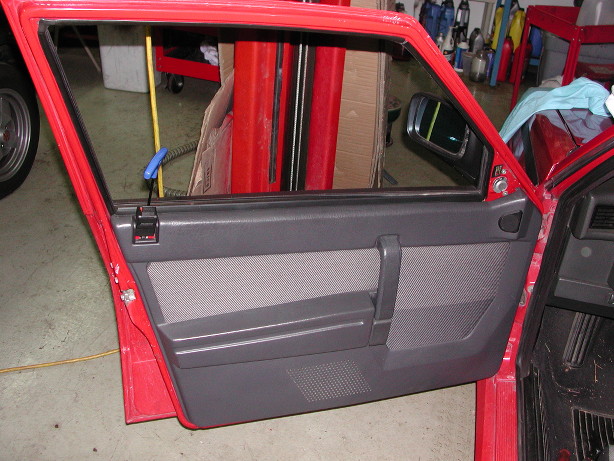
Pop off the triangular trim behind the side view mirror, and flip up the top of the lock button
so it can be unscrewed (the tab pries up from the window side). Next carefully pry up the cover
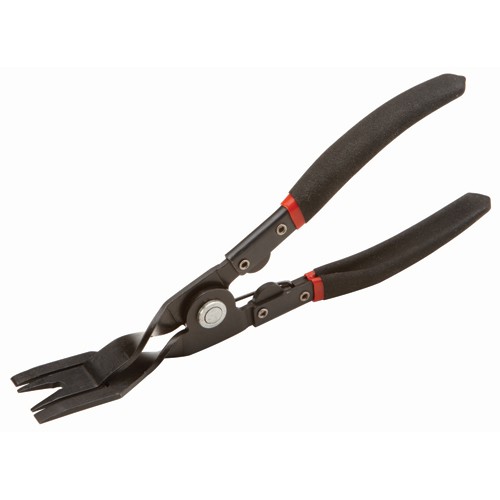
piece on the handle and remove the two screws holding the handle to the door. Then pop the clips
holding the door panel on, I've found using some cheap (cost about $7.99 less 20% with a coupon)
Harbor Freight panel clip pliers helps to keep from breaking the clips, here is what the ones I used look like:
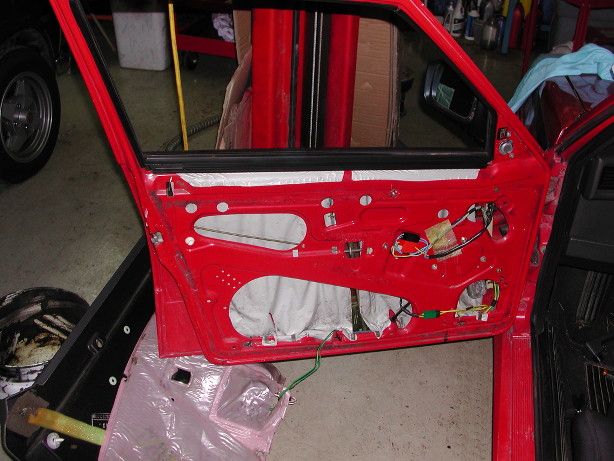
Now you need to undo the two nuts holding the window to the regulator. I found that for the front doors putting the window all the way down worked well, for the rear doors it is better to only put the window about half way down.
Now disconnect the window bracket from the regulator by pushing the window bracket back on
both sides, this can be a little tricky as it might be tight. Once that is done push the window
all the way up in the track and tape it up with some duct tape.
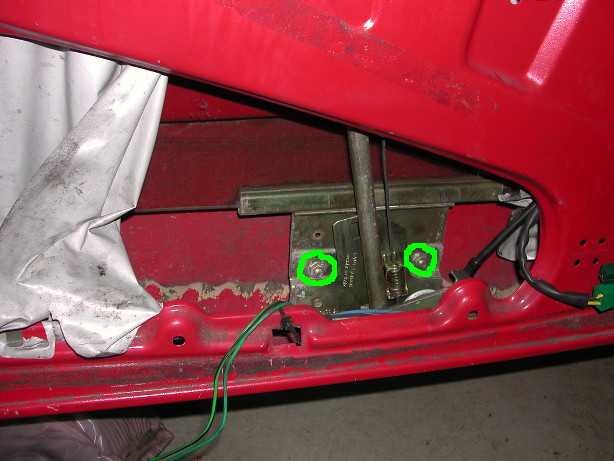
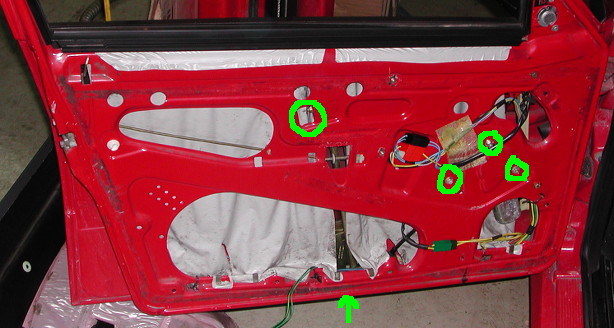
Now undo the 5 nuts holding the regulator in, the one on the bottom is underneath the door.
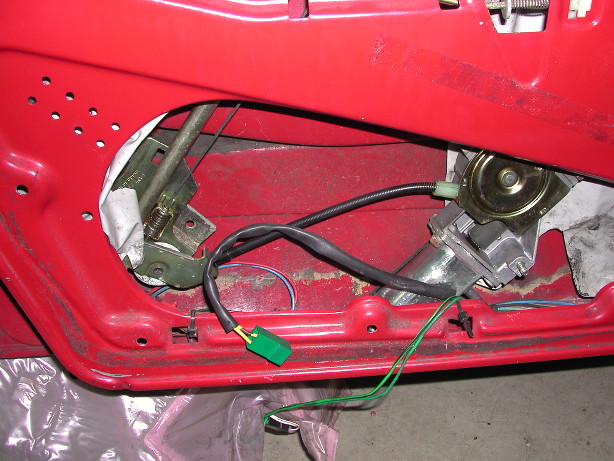
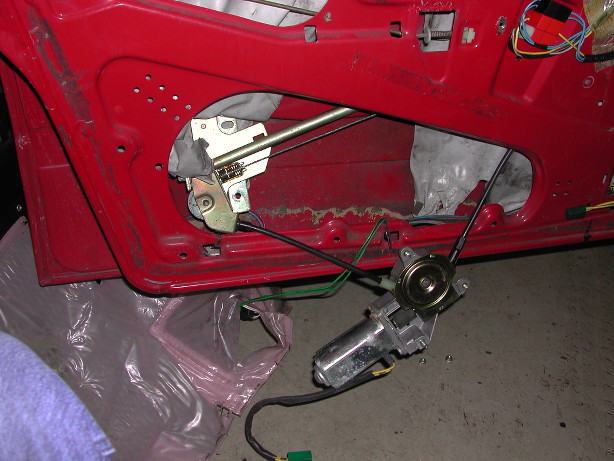
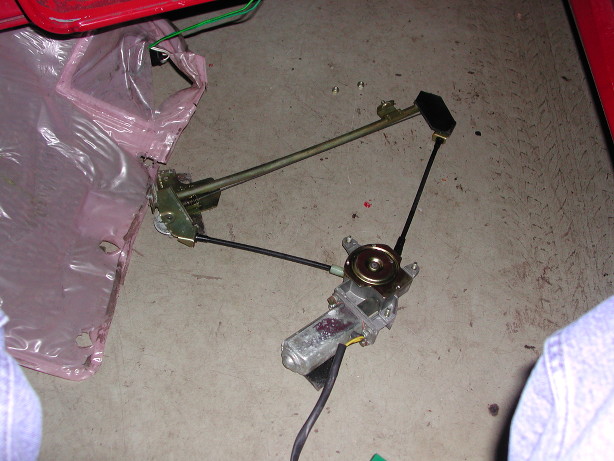
Now the regulator can be removed. Slide it to the left, then get the motor out, then slide
back towards the right and pull the left end out and then you should be able to remove the
rest of the unit. The posts that the nuts were attached to tend to get hung up in there so
take it slow and don't force it.

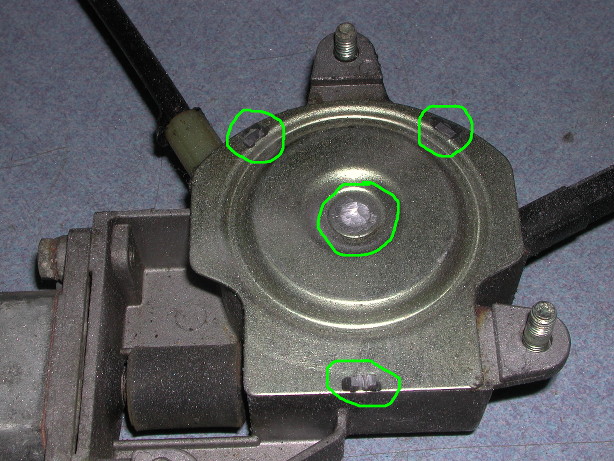
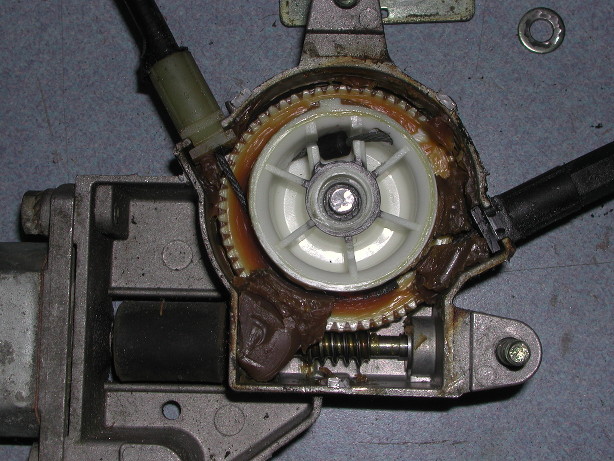
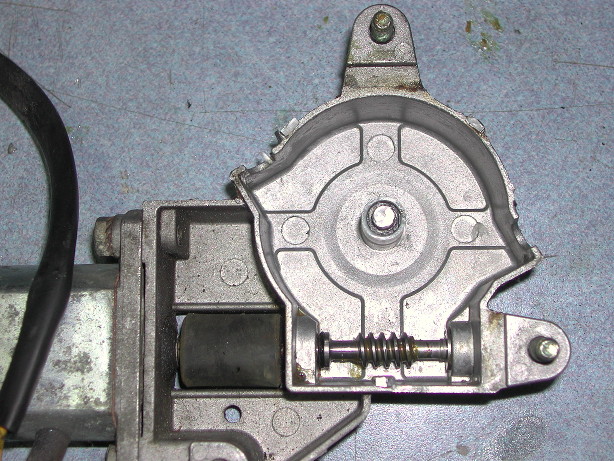
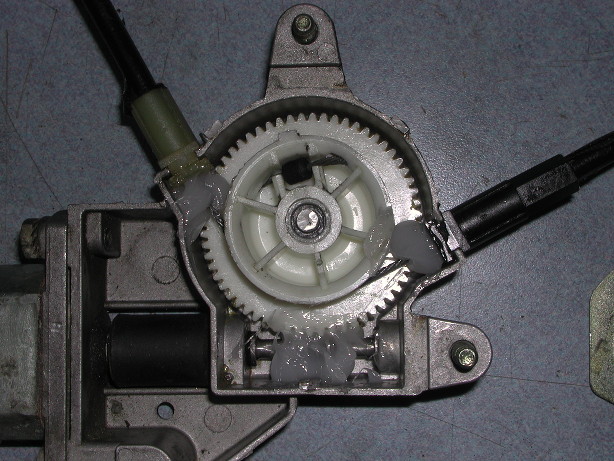
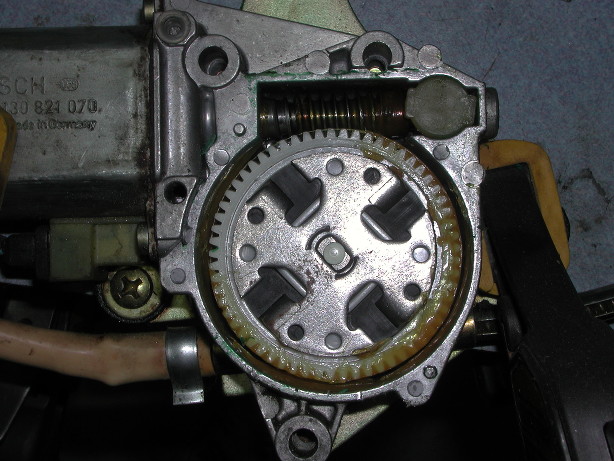
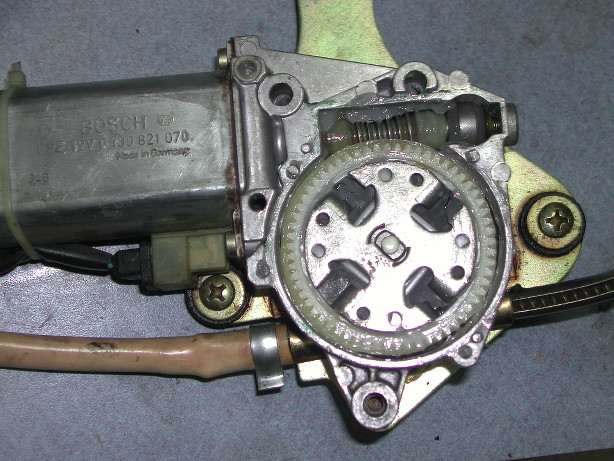
Now time to open up the regulator, grind these down flush with the cover (note the washer in the center):
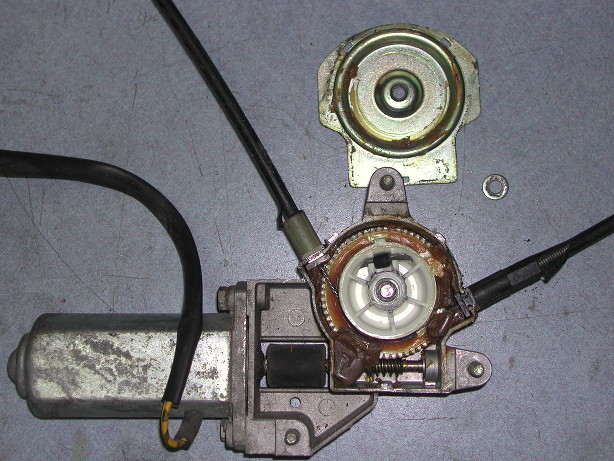
Carefully pry the cover off with a screwdriver, might take some jiggling but be careful not to bend it. Now you can see all the old gummy grease slowing things down.
Next I removed the gear and cabling from the motor housing, careful to not let the wire unwind,
I think I used a clamp or something to keep the wire in place. Once that was out I cleaned up
the housing with some simple green followed by a rinse with water (don't leave the simple green
residue on parts, always rinse it off with water and dry.
I used a hair dryer to make sure the parts cleaned with simple green and rinsed with water were dry.
The lubrication I used was "Super Lube" which I was able to find at my local Harbor Freight.
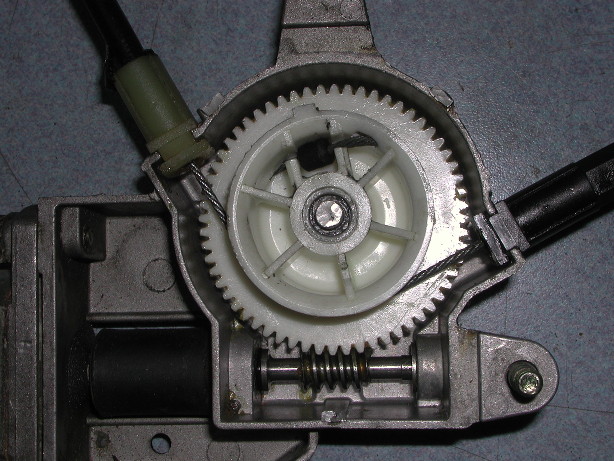
Housing all cleaned up

Reassembled with the cleaned parts
Now it was time to clean the wire properly. I found the best way to do that was to hook the wire up to a power source and cycle it back and forth and run the wire through a cloth. I didn't have a battery handy so I used the Super :-). You have to be careful to hold the parts down so they don't jump out as you are cycling it. To cycle it I had a remote starter switch wired in to activate it and just swapped what terminals + and - were connected to on the connector. Once the wire was clean it was time to put the new grease on.
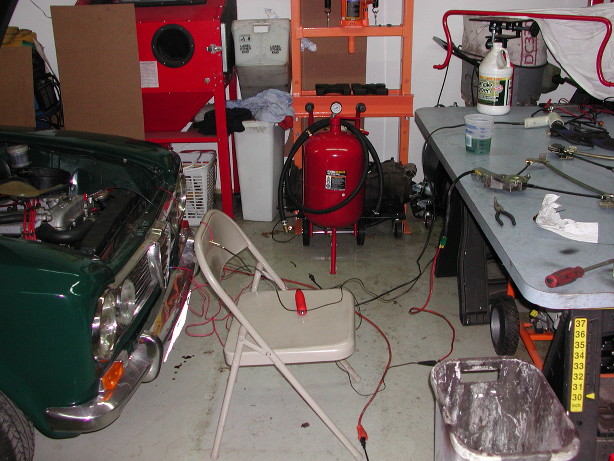
Using the Super as a power source to clean the regulator wire
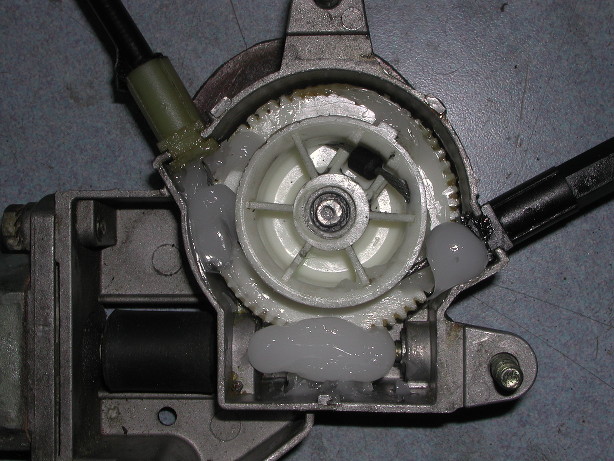
Ready for grease
Initial greasing
Now time to get the cover back on, to do this I drilled and tapped a small hole (I think it was 7mm, sorry I can't remember exactly as I'm writing this up months after I did the work!). Do this with the cover on so the metal bits don't get in the grease. Actually you should probably do this before greasing things up, that is what I did for the second one. Next I test fitted the cover with the screw and then cycled the regulator back and forth a few times with the Super power source. I then opened it back up and added some more grease, put the cover back on using some threadlocker blue on the screw and reinstalled it in car.

Drilled and tapped
Added more grease after cycling it back and forth a few times with the cover on
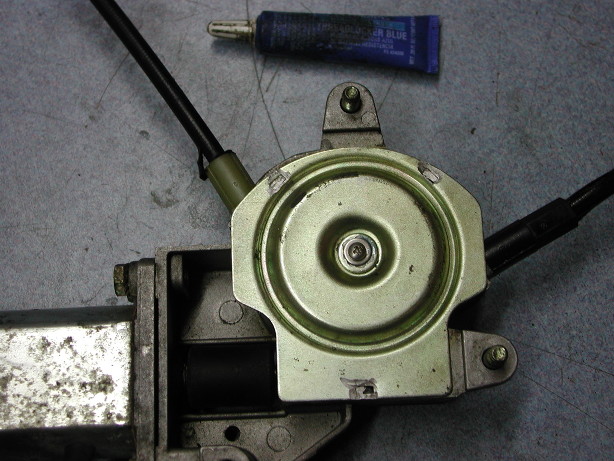
Ready to go back in the car, used some threadlocker blue to keep the screw in
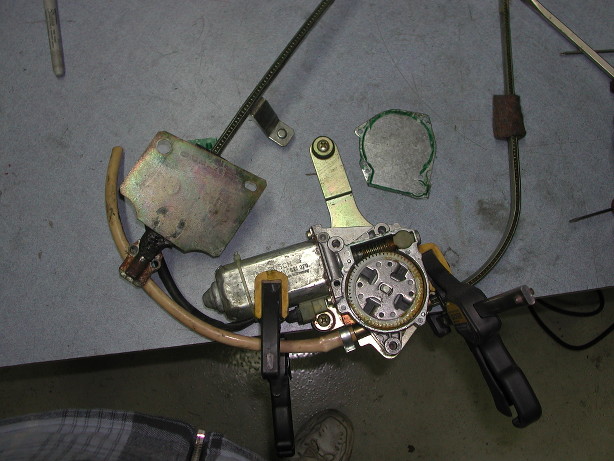
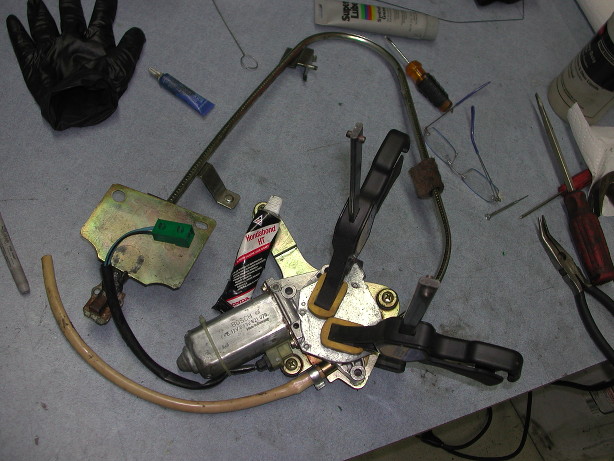
The rear window regulators are quite different from the fronts and the process I used to clean the old grease out was a bit different. They have a few more nuts to remove but are actually easier to get out of the door once disconnected.
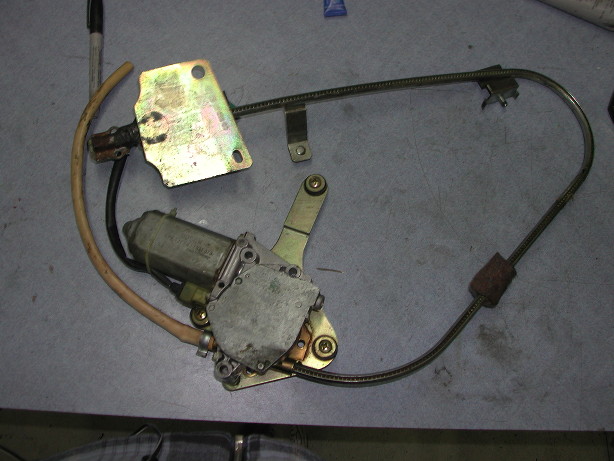
Rear regulator, you can see the plate that has to come off is quite different from the front
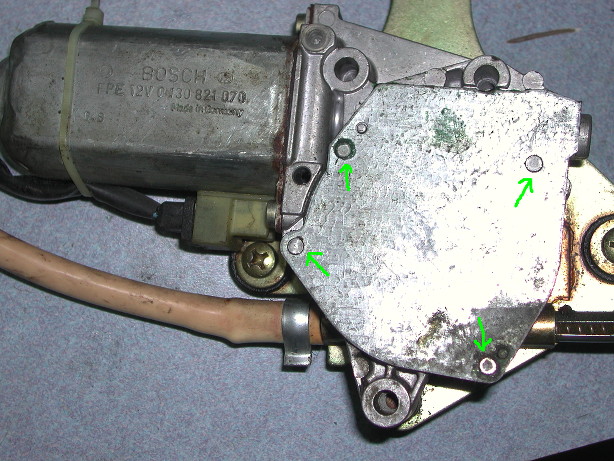
I ground these four nubs even with the cover surface
Carefully pry the cover off, it is held on with some green adhesive of some sort but mine came of without a lot of struggle.
Next I clamped the unit to my work bench and then used a small screwdriver to get as much of the old grease out as I could.
I also tried to get as much grease out of the rest of the unit, that didn't really have that much.
Clamped to the table and starting to clean
Closeup of partial clean, just using a small screwdriver and some paper towels, slow work!
I did the same thing as the fronts and hooked up the connector to the Super power source and ran the cable up and down a few times and then packed in a little more grease.
All greased up and ready to close
To close up the rears was a little different than the front. I had some Hondabond HT lying around and laid a thin bead around the perimeter of the cover (after making sure there was no grease where it would sit) and then clamped it down and left them for a couple days to be sure they set (my garage was only about 43F when I'm not working in it).
C
Once that was dry I installed them back in the car. Overall I'm very happy with the results. To give it a real test
I left the car outside all day when it was around 5-10F and the windows went up and down nicely. In addition to regreasing
the regulators I also lubed up the window flet channels with some silicon based spray lube to be safe, although I had done
that years ago when first trying to address the slow windows with only a very minor amount of improvement.
Here is a video I made of one of the windows before and after side by side to show the difference, and this wasn't even the slowest one!